Make Iphon Apps

How to Creat Iphone Apps

How to Screenshot on a Macbook or Mac OS X

How to Screenshot on a Macbook or Mac OS X

Prev<<<   How To Take Screenshot Windows Phone

Have you ever looked Printscreen button on the keyboard macbook ?? I believe you lied when saying look this. There is not Prinscreen button on the keyboard MACBOOK. If there is no button prinscreen then how to do prinscreen on macbook ?? Do you think the founding fathernya mac, Steve Jobs forget about Printscreen? Haha..
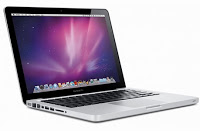
How to Screenshot on a Macbook
Macbook


Of course PrintScreen CAN be done in Macbook / Mac OS X, There are several ways to do prinscreen / Print screen in macbook some of them:

1. By using an application called GRAB

    GRAB is an Apple application that allows to perform Macbook Screen Capture on-screen, this program can take a picture of the entire screen, the active application window picture, and may even take your own.

    You can find it in APPLICATION / UTILITIES / GRAB

    But there are some drawbacks in using this application that you need more memory to run it, then you will have difficulty if you want to take pictures of the menus hidden / concealed from an application if you want to make a tutorial or something.
   
2. Using SHORTCUT or a combination of several keyboard

    I recommend you to use this road. In addition to easy, how is classified as the most effective way and also the easiest to do printscreen in macbook / Mac OS X.

    You only need to exercise three buttons pressed simultaneously. I'm sure you already proficient and able to do this.

    How to do a printscreen with Shortcut is:

2.1. Take pictures WHOLE SCREEN
    Press: Cmd + Shift + 3 and release simultaneously.

    After doing this you will see an image on your desktop called PICTURE 1, which is the result of your printscreen.

How to Screenshot on a Macbook or Mac OS X 01
How to Screenshot on a Macbook or Mac OS X (1)

2.2. Amounting to take screen shots of your wishes
    Press: Cmd + Shift + 4 and release
    Next you will see korsur turn into the +

    Next use the mouse to select and determine the amount of area on the screen you want to capture.
    Results capture will also be visible on the desktop.

How to Screenshot on a Macbook or Mac OS X 02
How to Screenshot on a Macbook or Mac OS X (2)

2.3. Take a picture of an application window on the screen
    Press: Cmd + Shift + 4 and release simultaneously then press SPACE.
    Next you will see korsur turned into a sign CAMERA

    Next you just direct the camera korsur to window or windows you want to capture / grab.
    Results capture will also be visible on the desktop.

How to Screenshot on a Macbook or Mac OS X 03
How to Screenshot on a Macbook or Mac OS X (3)

That's the way to take pictures from the desktop using the Printscreen in Macbook or Mac OS X, I hope this tutorial can be useful for the reader who faithfully read this article.

Related Articles:

http://creatscreenshot.blogspot.com/2015/07/how-to-screenshot-on-computer-with-3.html
How to Screenshot on a Computer with 3 Method

http://creatscreenshot.blogspot.com/2015/07/take-screenshot-android-with-4-options.html
Take Screenshot Android with 4 Options

http://creatscreenshot.blogspot.com/2015/07/desktop-screenshot.html
Desktop Screenshot

http://creatscreenshot.blogspot.com/2015/07/prev-desktop-screenshot-screenshot-on.html
Screenshot on Samsung s4

http://creatscreenshot.blogspot.com/2015/07/how-to-screenshot-in-windows-7.html
How to Screenshot in Windows 7

http://creatscreenshot.blogspot.com/2015/07/take-screenshot-windows-8.html
Take Screenshot Windows 8

http://creatscreenshot.blogspot.com/2015/07/take-screenshot-iphone-and-iphone-6.html
Take Screenshot Iphone and Iphone 6

http://creatscreenshot.blogspot.com/2015/07/screen-capture-android-on-some-android.html
Screen Capture Android

http://creatscreenshot.blogspot.com/2015/07/how-to-screenshot-on-sony-xperia.html
How To Screenshot On Sony Xperia

http://creatscreenshot.blogspot.com/2015/07/how-to-take-screenshot-windows-phone.html
How To Take Screenshot Windows Phone

How To Screenshot On Nexus 7 with 2 Ways

How To Screenshot On Nexus 7 with 2 Ways


1. To take a screenshot on your new Nexus 7, hold in the volume down and the power buttons at the same time.
After a brief pause, you'll hear an audible noise and see an animation.

2. With Screen Maker Application

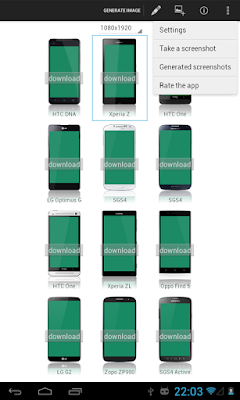
Taking a screenshot on display at the nexus often do users, usually to show off the results of its theming, and shared to forums, but users mostly just taking his screen image, not menyertkan frame nexus phones that are in use. Usually the users to add frames to the screenshots that have been taken are using the photoshop to edit it. Now you do not have to bother anymore have to use photoshop to edit because existing applications that can take screenshots at the same frame / or body cell phone, Screen Maker application name to make it look more steadily when in the share in the forum.

Screen maker application can be downloaded for free and there is also a pro version of it, this application supports 18 sbagai following resolution size, 240x320, 240x400, 320x480, 360x640, 480x800, 480x854, 480x600, 480x1024, 540x960, 640x960, 600x800, 600x1024, 720x1280, 768x1280, 800x1280, 1080x1920, 1200x1920, 1600x2560, you can adjust the resolution with phone you are using.

This is an example of the results will happen:


How To Screenshot On Nexus 7 with 2 Ways 01

In addition you can choose the size of the resolution, you can also choose the type of other phones with the same resolution of your cell phone.


How To Screenshot On Nexus 7 with 2 Ways 02


Once you've successfully you can directly edit nge-screen share your edits. Download Screen Maker application in the play store

This is the frame / body cell phone provided by the application screen maker:

    Nexus smartphone
    Nexus 5
    Nexus One
    Nexus S
    Galaxy Nexus
    Nexus 4
    Nexus 7
    Nexus 10
    Nexus 7 (2013)
    HTC smartphones
    HTC One
    HTC DNA
    HTC One X
    HTC One X +
    HTC One V
    HTC One S
    HTC Evo 4G LTE
    HTC Evo 3D
    HTC Incredible S
    HTC Sensation
    HTC Desire X
    HTC Desire HD
    HTC HD2
    HTC Wildfire S
    HTC Explorer
    HTC Dream
    HTC Eris
    HTC Jetstream
    HTC Desire S
    HTC Desire Z
    HTC Sensation XE
    Samsung smartphone
    SGS 4 Active
    SGS 4
    SGS Advance
    SGS
    SGS2
    SGS3
    SGS3 Mini
    Samsung Note 3
    Samsung Note 2
    Note Samsung
    Samsung Y
    Samsung W
    Samsung ACE
    Samsung Galaxy Tab 2 7.0
    Samsung Galaxy Tab 10.1
    4G Samsung Galaxy exibit
    Samsung Galaxy Mini 2
    Samsung Galaxy Mini
    Samsung Gio
    Note Samsung 8.0
    SmartphoneSony Sony Xperia Z "Yuga"
    Sony Xperia ZL
    Sony Xperia S
    Sony Xperia P
    Sony-Ericsson Xperia X10
    Sony-Ericsson Xperia Arc S
    Sony Xperia Tipo
    Sony Xperia Ray
    Sony Xperia T
    Sony Xperia Play
    Sony Xperia Miro
    Sony Xperia Mini
    Sony Xperia Sola
    Sony Xperia SP
    Motorola Smartphone
    Motorola Razr M
    Motorola Photon 4G
    Motorola Razr
    Motorola MOTOLUXE
    Motorola Atrix 4G
    Moto X
    Etc
    Asus Transformer
    Meizu MX
    ZTE Blade
    ZTE Skate
    Oppo Find 5
    Oppo R819
    Kindle Fire
    LG Optimus G
    Zopo ZP990
    Nokia Lumia 925

Easy right? screenshot of course you become more attractive if you add a

frame. Good luck and hopefully useful.

How To Take Screenshot Windows Phone
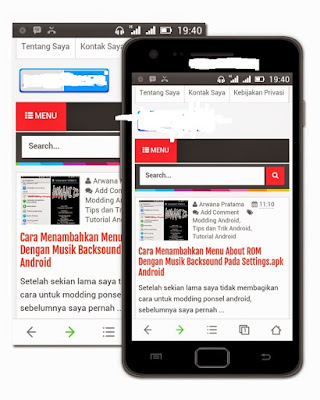
How To Take Screenshot Windows Phone
Prev<<<   How To Screenshot On Sony Xperia
When you want to share your mobile phone screen nokia lumia be confused how to take a screenshot? Not separti the previous nokia symbian OS that still require additional applications to take screenshootnya. Ok, here I will share how or shot screen shoot
, Indeed, to take on windows phone a little secret or hidden, but if you already know it is almost certain you will be able to do this with ease, well here's how to take a screenshot on a Windows phone.

How To Take Screenshot Windows Phone 01
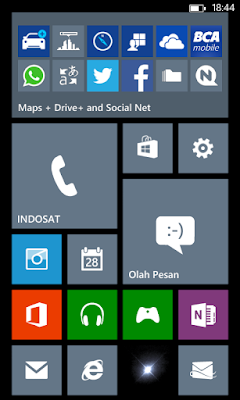
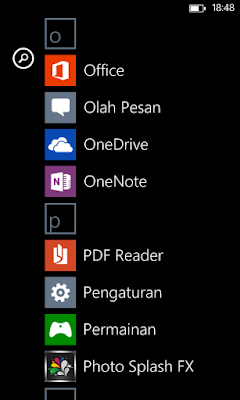

* Simply press the Power button and the Start button *
Very easy to take screenshot on your Nokia Lumia 620 and Other Windows Phone . You can press the power button (or buttons lockscreen) located on the right side of the phone and the Start button at the bottom of the screen and right in the middle of the logo-shaped windows. this is done simultaneously do not just press the power button without pressing the start button or vice versa
If you managed to take a screenshot will sound like when you take pictures and will display pages fetched as screenshootnya.Untuk ensure you succeed screenshot can just check the file in the photo gallery of your Nokia lumia 620 and find a folder named 'screenshots' or 'screenshot' and This folder automatically appears when performing the first screenshot, when it can see the results live share to facebook or email and also other applications to fit your needs.
Easy enough not to take screenshots on nokia lumia 620? and how this applies also on windows phone lainnya.Demikian just how to take screenshot on your Nokia Lumia 620 and Windows Phone may be able to help my friends do not forget to leave a trail yes How to take a screenshot on your Nokia Lumia 620 and Windows Phone Others
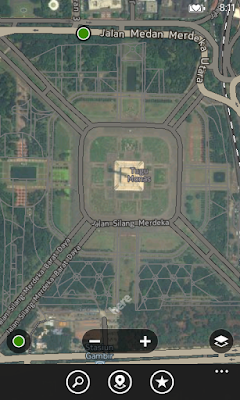
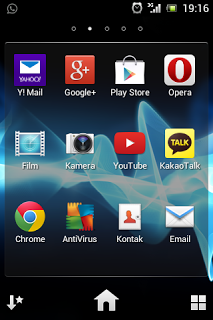
Photo screenshot:


How To Take Screenshot Windows Phone 02
How To Take Screenshot Windows Phone 03
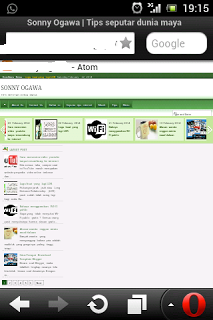
Just added only, way above only applies in Lumia WP8-up.
Maybe helpful. , , Good Luck..

Related Articles:
http://creatscreenshot.blogspot.com/2015/07/4-way-take-screenshot-mac.html
4 Ways Take a Screenshot on a Mac

http://creatscreenshot.blogspot.com/2015/07/how-to-screenshot-on-computer-with-3.html
How to Screenshot on a Computer with 3 Method

http://creatscreenshot.blogspot.com/2015/07/take-screenshot-android-with-4-options.html
Take Screenshot Android with 4 Options

http://creatscreenshot.blogspot.com/2015/07/desktop-screenshot.html
Desktop Screenshot

http://creatscreenshot.blogspot.com/2015/07/prev-desktop-screenshot-screenshot-on.html
Screenshot on Samsung s4

http://creatscreenshot.blogspot.com/2015/07/how-to-screenshot-in-windows-7.html
How to Screenshot in Windows 7

http://creatscreenshot.blogspot.com/2015/07/take-screenshot-windows-8.html
Take Screenshot Windows 8

http://creatscreenshot.blogspot.com/2015/07/take-screenshot-iphone-and-iphone-6.html
Take Screenshot Iphone and Iphone 6

http://creatscreenshot.blogspot.com/2015/07/screen-capture-android-on-some-android.html
Screen Capture Android

http://creatscreenshot.blogspot.com/2015/07/how-to-screenshot-on-sony-xperia.html
How To Screenshot On Sony Xperia

"How To Screenshot On Sony Xperia"

How to Take a Screenshot Image In the HP SONY XPERIA 

Prev<<<  Take Screenshot Iphone and Iphone 6
I will try to share a little bit to the Blog readers on how to take a screenshot on a mobile phone screen SONY XPERIA


"How To Screenshot On Sony Xperia" 01
How To Screenshot On Sony Xperia 01

Maybe some of you there who do not know about this feature. As we already know that, HP android operating system consists of various versions of the earliest to the latest version at this time. Each version has a different way of taking a screenshot image. And by chance that I was the SONY XPERIA version of ICS.

And if you are a user of mobile phone SONY XPERIA the same version with which I use. Consider the following way:
Please find a picture where you want to take pictures on your phone screen, you then simultaneously press and hold the Power button and Volume button (-) for a few seconds until it shakes and sounds like when we take photos, then automatically the screenshot image will be saved , if completed, open the gallery or file manager on your phone and search for the image you'd take.

Example: I took this picture using XPERIA hp version of the ICS

Pic2
"How To Screenshot On Sony Xperia" 02
How To Screenshot On Sony Xperia 02

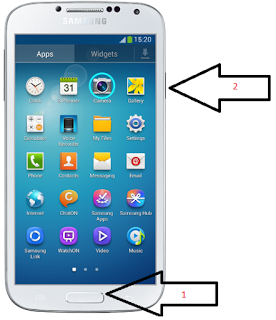
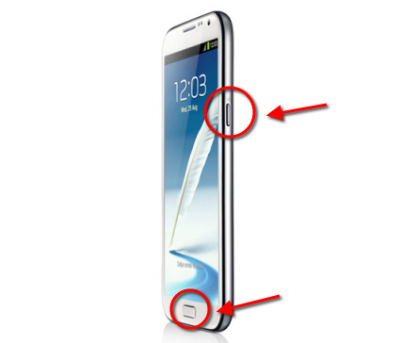
Easy is not it? To hp other brands, I think almost the same as the above, may only differ slightly. For example samsung only using POWER BUTTON AND HOME. and for some other way, Please you search on Google, this time few tips may be useful.

Good Luck...

Related Article:
http://creatscreenshot.blogspot.com/2015/07/how-to-take-screenshot-pc-or-laptop.html
How To Take Screenshot PC or Laptop Monitor Screen

http://creatscreenshot.blogspot.com/2015/07/4-way-take-screenshot-mac.html
4 Ways Take a Screenshot on a Mac

http://creatscreenshot.blogspot.com/2015/07/how-to-screenshot-on-computer-with-3.html
How to Screenshot on a Computer with 3 Method

http://creatscreenshot.blogspot.com/2015/07/take-screenshot-android-with-4-options.html
Take Screenshot Android with 4 Options

http://creatscreenshot.blogspot.com/2015/07/desktop-screenshot.html
Desktop Screenshot

http://creatscreenshot.blogspot.com/2015/07/prev-desktop-screenshot-screenshot-on.html
Screenshot on Samsung s4

http://creatscreenshot.blogspot.com/2015/07/how-to-screenshot-in-windows-7.html
How to Screenshot in Windows 7

http://creatscreenshot.blogspot.com/2015/07/take-screenshot-windows-8.html
Take Screenshot Windows 8

Take Screenshot Iphone and Iphone 6
http://creatscreenshot.blogspot.com/2015/07/take-screenshot-iphone-and-iphone-6.html

Screen Capture Android
http://creatscreenshot.blogspot.com/2015/07/screen-capture-android-on-some-android.html

Take Screenshot Iphone and Iphone 6 + Easily

Take Screenshot Iphone Easily


How to Take a Screenshot in iPhone and iPhone 6 Plus
According to some people, take screenshots on the iPhone screen is considered important, because you can display and share what's going on your iPhone springboard. There was also some people also intentionally immortalize important moments in the game that they play becoming a photograph as proof or special memories.

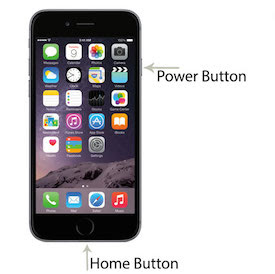
In general, to take a Screenshot on iOS perangka namely by press the home button and power simultaneously in a fast time. There is also by utilizing the touch assistive features which are virtual keys and an alternative harware buttons on your device.

I will explain step by step, two ways that have been mentioned.

"Take Screenshot Iphone" 01
Take Screenshot Iphone 01

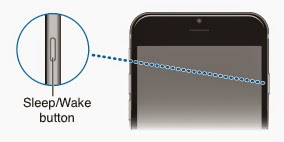
Because the iPhone 6 and iPhone 6 Plus has changed in terms of design physical, by shifting the power / sleep that on the side device, this is not unusual, considering each perangka iOS has The button on the top right in older iPhone versions. However, it is not becomes a problem, because we consider it as just the latest innovation from Apple are present in the iPhone 6 and iPhone 6 Plus. However, Although the position of the power / sleep experienced a shift in the right side of the body of the iPhone 6 and iPhone 6 plus, but nonetheless

This button has the same function in general on iOS devices, such as turn off or make it in a position to sleep. even to take Screenshot on your device.


Please follow the guidelines below that explains step by step:


How to Take a Screenshot in iPhone 6 and iPhone 6 Plus, and we started by using the Home button and the Power / Sleep.


Step 1:
Press and hold the power / sleep that is located on the right devices. because the previous generation iPhone this button is located on the above.

"Take Screenshot Iphone" 02
Take Screenshot Iphone 02

Step 2:
Without releasing the Power / Sleep, then press the Hotkeys home.

You must do step 2 quickly.


"Take Screenshot Iphone" 03
Take Screenshot Iphone 03

You need to know, you can take a screenshot at any part in iOS, unless you try to take a screenshot on the screen lockscreen, Touch ID that has been activated can prevent you to take a Screenshot in this section. But if you do it right, your screenwill blinks then the camera will produce a distinctive sound when taking images.

The second way, is most often used by users of IOS, because in addition to create physical buttons you be durable, Assistive Touch is also considered as a replacement home button and the power that works less well.


Step 1:
Please you activate the Assistive Touch feature in the iPhone 6 and iPhone 6 Plus you, by the way Go to Application Settings General Accessibility and enable Toggle On Assistive Touch.

Step 2:
If the Assistive Touch has activated you can find it on the screen springboar your device, Assistive Touch has a white color and round, and when you touch will display some menus.

Step 3:
On the menu, & nbsp; There are many parts to function respectively, including replacement Home button, To take a screenshot through this feature, from the menu, you select Device> More> then select Screenshot. With this cata, you do not need to worry because think if the roundness of the Assistive Touch will go in on the photo results screenshot.

All photographs of the results of screenshots on iphone 6 and iPhone 6 plus will Applications are stored automatically on the "Photos".
Good Luck...

Screen Capture Android on some Android Phone

Screen Capture Android on some Android Phone
Prev<<<   Take Screenshot Windows 8
"Screen Capture Android" 01
Screen Capture Android 01

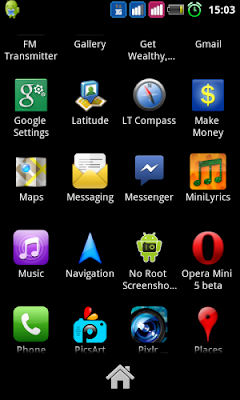
Screenshot / screen capture is the process of taking a picture of Hand
phone. Screenshot be used to retrieve information on the phone as the
conversation history, the result of a game, display an error, even just to
share what we are seeing in our mobile phones.
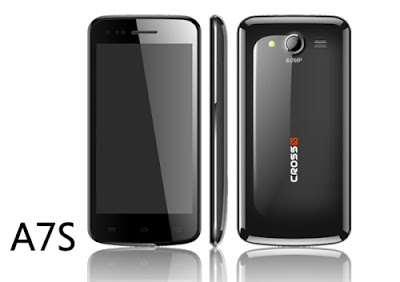
Pictured above is an example screenshot of HP Cross A7S. Screenshot often
also referred to as Screen Capture. Usually when making a screenshot in HP
will be given notification sound when shooting with the camera
How to take a screenshot of this vary with each type Hand Phone/HP type to another.

Here's how to do screenshots on a few types of HP:

1. Screen Capture Android on Samsung Galaxy Young Galaxy Young Duos, Galaxy Mini and Galaxy Star

"Screen Capture Android" 02
Screen Capture Android 02

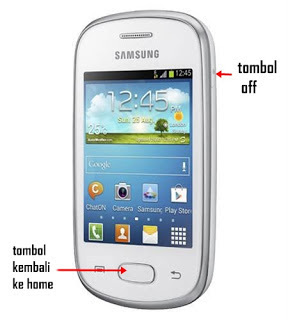
galaxy-starCara doing Screenshot of the HP Samsung Galaxy Young Galaxy Young
Duos, Galaxy Mini and Galaxy Star is to press and hold the HOME button and
then press the LOCK button twice. HOME button at the center and the LOCK
button on the right. Screenshot image can be seen on Screencapture folder.

2. Screen Capture Android on Evercoss and Cross Andromeda Series

"Screen Capture Android" 03
Screen Capture Android 03

Screenshot cross-a7sCara perform on HP Evercoss and Cross Andromeda like A7S
Cross, Cross A7T and Cross A88 is to press the VOLUME DOWN button (below)
and POWER button simultaneously for 3 seconds. Screenshot image can be seen
at the Gallery in the Screenshots folder.

3. Screen Capture Android on Oppo Smartphone
"Screen Capture Android" 04
Screen Capture Android 04

oppo-smartphoneCara doing Screenshot of the HP Smartphone Oppo is to press
the VOLUME DOWN button (below) and POWER button simultaneously for 3
seconds. Screenshot image can be seen at the Gallery in the Screenshots
folder.

4. Screen Capture Android on Sony Xperia


"Screen Capture Android" 05
Screen Capture Android 05


Sony-XperiaCara do screenshot on the HP Sony Xperia is to press the VOLUME
DOWN button (below) and POWER button simultaneously for 3 seconds.
Screenshot images are instantly displayed on the notification panel and can
be seen in the Gallery.

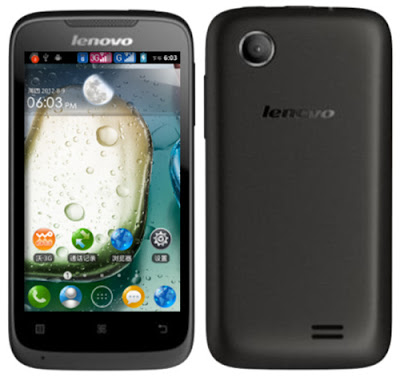
5. Screen Capture Android on Lenovo Smartphone


"Screen Capture Android" 06
Screen Capture Android 06

lenovo-a369iCara doing Screenshot of the HP Lenovo Lenovo Smartphone as
A369i is to press the VOLUME DOWN button (below) and POWER button
simultaneously for 3 seconds. Screenshot image can be seen at the Gallery in
the Screenshots folder.


Thank you for reading Take Screen Capture Android, may be useful.
Good Luck...

Related Articles:


http://creatscreenshot.blogspot.com/2015/07/how-to-take-screenshot-pc-or-laptop.html
How To Take Screenshot PC or Laptop Monitor Screen

http://creatscreenshot.blogspot.com/2015/07/4-way-take-screenshot-mac.html
4 Ways Take a Screenshot on a Mac

http://creatscreenshot.blogspot.com/2015/07/how-to-screenshot-on-computer-with-3.html
How to Screenshot on a Computer with 3 Method

http://creatscreenshot.blogspot.com/2015/07/take-screenshot-android-with-4-options.html
Take Screenshot Android with 4 Options

http://creatscreenshot.blogspot.com/2015/07/desktop-screenshot.html
Desktop Screenshot

http://creatscreenshot.blogspot.com/2015/07/prev-desktop-screenshot-screenshot-on.html
Screenshot on Samsung s4


http://creatscreenshot.blogspot.com/2015/07/how-to-screenshot-in-windows-7.html
How to Screenshot in Windows 7


http://creatscreenshot.blogspot.com/2015/07/take-screenshot-windows-8.html
Take Screenshot Windows 8

Take Screenshot Windows 8

Take Screenshot Windows 8

Prev<<<  Screenshot on Samsung s4
Hello There...This time we provides tutorials for Windows lovers, rather users Windows 8.
Perhaps tips or tricks you already know for a long time. Tips and tricks
about taking screenshots. Do you often take a screenshot? In versions of
Windows prior to Windows 8, you can use Alt + PrtScr PrtScr or just to take
a screenshot. Actually in Windows 8 you can also do that, but do you know
that there is a new technique that you can use?

How do I take a screenshot in Windows 8 and 8.1 quickly and practically? To take a
screenshot and saves it automatically in Windows 8, you can press the
Windows + PrtScr. If in versions prior to Windows 8, you must do the
screenshots first, you paste into the paint. This greatly helps you because
you can take screenshots quickly.

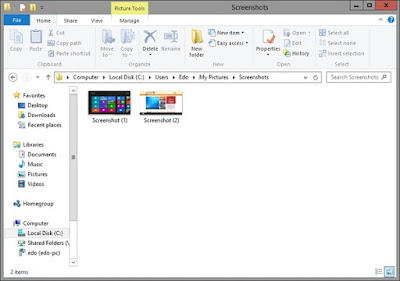
When you press the Windows + PrtScr then Windows 8 will save result
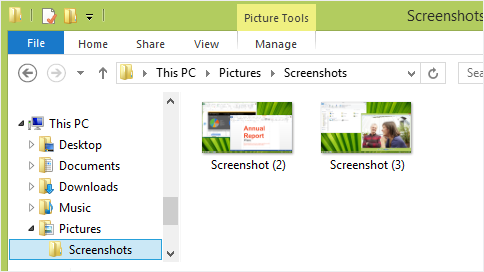
screenshots into the folder C: \ Users \\ My Pictures \ Screenshots.

"Take Screenshot Windows 8" -1
Take Screenshot Windows 8 (1)

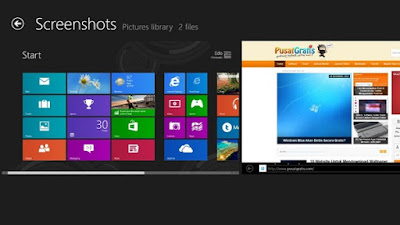
You can also see it from the Photos Library on Photos on the Start Screen.

Screenshot ways and Direct Store in Windows 8Pic2
"Take Screenshot Windows 8" -2
Take Screenshot Windows 8 (2)
Well now for users of Windows 8, if you want to take a screenshot definitely
be easier. You do not need to use tools anymore. Because of the way Windows
8 screenshots in the PG share this time is very quick and practical for you.

Thank you for reading Take Screenshot Windows 8.1, may be useful.
Good Luck...

Related Articles:


http://creatscreenshot.blogspot.com/2015/07/how-to-take-screenshot-pc-or-laptop.html
How To Take Screenshot PC or Laptop Monitor Screen

http://creatscreenshot.blogspot.com/2015/07/4-way-take-screenshot-mac.html
4 Ways Take a Screenshot on a Mac

http://creatscreenshot.blogspot.com/2015/07/how-to-screenshot-on-computer-with-3.html
How to Screenshot on a Computer with 3 Method

http://creatscreenshot.blogspot.com/2015/07/take-screenshot-android-with-4-options.html
Take Screenshot Android with 4 Options

http://creatscreenshot.blogspot.com/2015/07/desktop-screenshot.html
Desktop Screenshot

http://creatscreenshot.blogspot.com/2015/07/prev-desktop-screenshot-screenshot-on.html
Screenshot on Samsung s4

http://creatscreenshot.blogspot.com/2015/07/how-to-screenshot-in-windows-7.html
How to Screenshot in Windows 7

How to Screenshot in Windows 7

How to Screenshot in Windows 7

Prev<<<   Screenshot on Samsung s4
Hi All...Screenshot is an image taken from a computer or a PC, can be a desktop display, photos, website, or other views that we want. The main purpose of taking a screenshot is to show the information on the image, whether it be images, text, or other information. Additionally, the screenshot also often added to the documentation file or an article as you read this.

Most of the readers here already know how to take a screenshot. But it is possible if there are lay people who have not been able to take a screenshot. Therefore, in this article I want to show three ways that you can take screenshots directly into practice at home.

For example, I try to take a picture as below.

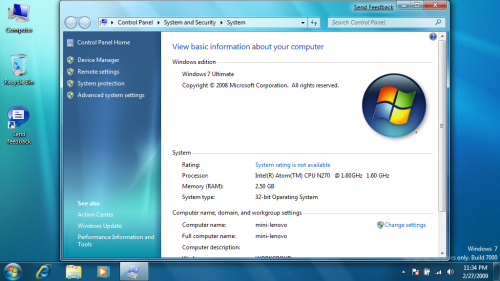
"How to Screenshot in Windows 7" -01
How to Screenshot in Windows 7 (1)

 1. Use the "Prt Scr" to Screenshot in Windows 7


This method is most commonly used money olehkebanyakan people. You can find this button on the top right of the keyboard, for PCs and laptops are not the same position for more minmalis laptop keyboard layout.

How do I take it? By pressing the "Prt Scr", that means you have to copy the images proficiency level. And automatically, the image is stored in RAM.

Next you open the paint application is already available in Windows, and then paste the image earlier by pressing "Ctrl + V". After that, you can see the pictures taken earlier, you can edit them at will.

"How to Screenshot in Windows 7" (2)
How to Screenshot in Windows 7 (2)

2. Using the combination keys "Alt + Prt Scr" to Screenshot in Windows 7


Basically this second way is not much different from the way first. It's just a button that we use is a combination of "Alt" and "Prt Scr", and also pictures taken only active application only. Like the image below.
"How to Screenshot in Windows 7" -3
How to Screenshot in Windows 7 (3)

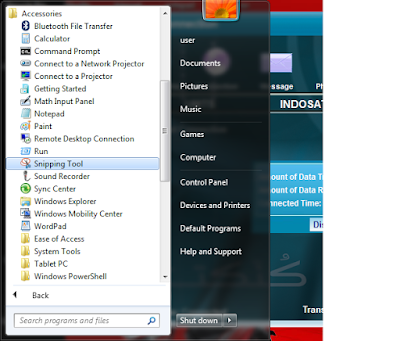
3. Using the "Snipping Tool" to Screenshot in Windows 7


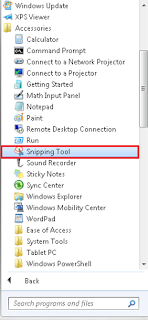
Snipping is an application provided by windows that can be used to take screenshots. By snipping tool you can take a screenshot on the area you want, so it is easier for us when you want to take a screenshot.


How to use the snipping tool


Open the application snipping tool, can be a way to type in the search form on the start menu.

"How to Screenshot in Windows 7" -4
How to Screenshot in Windows 7 (4)

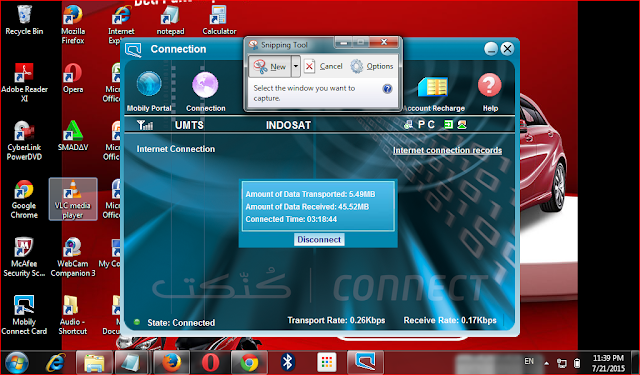
Once the application is open, you can no longer change the computer display. There is a good idea before opening the snipping tool, you have determined that the display will be in the screenshots first and then open its snipping tool. After that you can click New and start taking screenshots.

"How to Screenshot in Windows 7" -5
How to Screenshot in Windows 7 (5)


Tentunkan area you want to take by dragging using the cursor. After that save the images, can use the shortcut "Ctrl + S" or via the File menu.

"How to Screenshot in Windows 7" -6
How to Screenshot in Windows 7 (6)

How, very easy and simple is not it? With three ways above, you can already take a screenshot in windows. Incidentally in this tutorial I'm using Windows 7, for Windows 8 and Windows 8.1 You stay customize it. Good luck and hopefully useful !!

Related Article:

http://creatscreenshot.blogspot.com/2015/07/how-to-take-screenshot-pc-or-laptop.html
How To Take Screenshot PC or Laptop Monitor Screen

http://creatscreenshot.blogspot.com/2015/07/4-way-take-screenshot-mac.html
4 Ways Take a Screenshot on a Mac

http://creatscreenshot.blogspot.com/2015/07/how-to-screenshot-on-computer-with-3.html
How to Screenshot on a Computer with 3 Method

http://creatscreenshot.blogspot.com/2015/07/take-screenshot-android-with-4-options.html
Take Screenshot Android with 4 Options

http://creatscreenshot.blogspot.com/2015/07/desktop-screenshot.html
Desktop Screenshot

http://creatscreenshot.blogspot.com/2015/07/prev-desktop-screenshot-screenshot-on.html
Screenshot on Samsung s4

Screenshot on Samsung s4

Prev<<<   Desktop Screenshot

Screenshot on Samsung s4

Hi All...Samsung Galaxy S4 has arrived and for you the latest S series of smartphone owners have to do screenshots then it is very easy job compared to versions of the Galaxy S before, just with a simple sweeping motion to get a screenshot.

In the presence of a number of cool new features in the Galaxy S4 as Air Gesture, S Translator, S Health, shot Dual-Camera, Group Play, Smart Croll also Smart Pause, and much more. Please see the features of the Galaxy S4. Therefore let us follow along with how to take a screenshot in Galaxy S4 smartphone.

Although there are many applications that claim to be able to take a screenshot suit your convenience, but this does not require that you install the application, you can easily take screenshots directly from your S4 without download and install any application.

1. Way take a Screenshot on Samsung s4


Before beginning, please go to "Settings> My Device> Motion and Gestures" first and then enable the features Palm Motion.

To capture screenshots on your Galaxy S4, then sentu and Palm Motion Slider movement to turn it on or set ON. If you get a notice, you must tap OK and restart or ON in Screen Capture option.

"Screenshot on Samsung s4" -01
"Screenshot on Samsung s4"

You simply sweep on the screen of your smartphone and your screen will immediately capture the image. Screenshot who have captured will be directly stored in the "Gallery".


2. way to take Screenshot on Samsung s4


An alternative way, is to press Home + Power at S4 simultaneously to capture a screenshot for 1 or 2 seconds. And screenshots that have been caught can be accessed on the Drop Down or stored in the Gallery.

"Screenshot on Samsung s4" -2

If you have problems or failure, or even have a way better than the two ways described above, please write in the comments.


Thus tutorial how to take a Screenshot on Samsung s4 with ease without the need to use the software, please try hopefully this article can be useful.
Good Luck...

Related Articles:
http://creatscreenshot.blogspot.com/2015/07/how-to-take-screenshot-pc-or-laptop.htmlHow To Take Screenshot PC or Laptop Monitor Screen

http://creatscreenshot.blogspot.com/2015/07/4-way-take-screenshot-mac.html
4 Ways Take a Screenshot on a Mac

http://creatscreenshot.blogspot.com/2015/07/how-to-screenshot-on-computer-with-3.html
How to Screenshot on a Computer with 3 Method
http://creatscreenshot.blogspot.com/2015/07/take-screenshot-android-with-4-options.html
Take Screenshot Android with 4 Options


Desktop Screenshot

Desktop Screenshot

Prev<<<  Take Screenshot Android with 4 Options
Hi everyone....ScreenShot is the result of images taken from display on your computer desktop screen. many also software that serves to take a screen shot of the desktop, but if you did not bother to install the application, here I will share how to take pictures in the Desktop without having to install software.

"Desktop-Screenshot" 01
Desktop Screenshot (example)

This screenshot I personally think is very useful, with the screenshots you do not bother to copy or manipulate images on the screen something screenshot result was due to be stored in the form of images. The purpose of this screenshot is actually to facilitate the user in taking pictures or writing on the screen of our computer so that later we can see the results on the image.

Immediately, she How To Take ScreenShot in Computer / Laptop Without Software please be listened to and try


First way to take a Desktop Screenshot


"Desktop Screenshot" 02
Desktop Screenshot with Print Screen Key

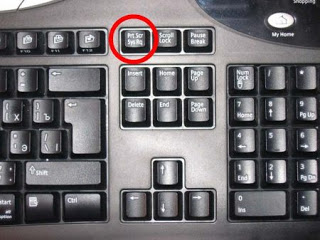
    1. Press the Print Screen key on the keyboard

    2. Then open Paint, then in paint press CTRL + V simultaneously

    3. Finish, screenshots will be out there. edit and save your little


Second way to capture a Desktop Screenshot


"Desktop Screenshot"
Desktop Screenshot with Spinning Tool

    1. Special that has a default Windows Snipping Tool application

    2. Select the Start Menu - All Programs - Accessories - Snipping tool

    3. Then click New hold and take a screenshot image to be retrieved

Thus tutorial how to take a desktop screenshot with ease without the need to use the software, please try hopefully this article can be useful.

Good Luck..!

Related Post:
http://creatscreenshot.blogspot.com/2015/07/how-to-take-screenshot-pc-or-laptop.htmlHow To Take Screenshot PC or Laptop Monitor Screen

http://creatscreenshot.blogspot.com/2015/07/4-way-take-screenshot-mac.html4 Ways Take a Screenshot on a Mac

http://creatscreenshot.blogspot.com/2015/07/how-to-screenshot-on-computer-with-3.htmlHow to Screenshot on a Computer with 3 Method

http://creatscreenshot.blogspot.com/2015/07/take-screenshot-android-with-4-options.htmlTake Screenshot Android with 4 Options

Take Screenshot Android with 4 Options

Take Screenshot Android with 4 Options

Next:<<< 4 Ways Take a Screenshot on a Mac

Here's How To Take Screenshot Some Android Written by Jeri Purba Here are some easy ways to take screenshots on Android. Could use a screenshot Android application, until the easiest by pressing a key or combination of keys. Typically, Android screenshot different ways between hp hp one with the other. Depending on the model and brand. Such as Samsung models, how to screen capture or screenshot differ with some locally-made Android smartphone models such as Evercoos and made in China such as OPPO smartphone. There are at least four ways to take screenshots on android, please in practice, perhaps one of the following ways suited to smartphone you use.

1. Approach Using the Power button to Take Screenshot Android


Some specific brand Android phones can take screenshots by simply pressing and holding the power button for about 3 seconds. If the support, the power menu available also include functions for taking screenshots.

2. The second way uses a combination of keys to take screenshot android.


To take a screenshot in some Android phone brand Samsung, use a combination of the power button and the menu button. Press both keys simultaneously quickly.

take screenshot android

   While in some Android smartphone brand Sony, Lenovo, OPPO, Evercoss, HTC One, way screenshots of Android can use a combination of the power button and a button to turn down the volume. Press both buttons simultaneously for 3 seconds. This can also be done on the phone Samsung Galaxy Tab 2 and Galaxy Nexus S.

3. Threeth Way to take screensho android with Sweeping Palms To Screen. 


In some Samsung smartphone in particular that use Android Jelly Bean OS and KitKat, Android screenshot how to do. Sweep / wipe the screen left or right quickly by using the palm of the hand. Phone screen should be completely covered with palms and how to wipe it (left or right) must also be done quickly.

4. Fourth Way to take screenshot android Using a special application screenshot.


Well, for those of you who still use the phone with the Android OS version 2.3 and under, way screenshots android can only be done using the application. Many applications screenshot Android in Google Play Store, from which free until paid. One screenshot free application that can be tried is artificial Lite app Screenshot NOROOT Mobikasa. Find and download via Google Play Store. Well, that's some way to take screenshots on Android. Please try one of them. Or if you have any tricks for megambil screenshot or screen capture in other Android phone, please share through kometar column below.

Thanks to read "Take Screenshot Android with 4 Options" on my blog.
Thanks and Good Luck..!

Next<<< 4 Ways Take a Screenshot on a Mac


Related Post:
How To Take Screenshot PC or Laptop Monitor Screen
How to Screenshot on a Computer with 3 Method
4 Ways Take a Screenshot on a Mac

How to Screenshot on a Computer with 3 Method

How to Screenshot on a Computer with 3 Method

Next: <<<  Take Screenshot Android with 4 Options

Hello Everyone...
After know about how screenshots on android phone, then how to screenshots on a computer screen? Can not photograph a computer screen into a drawing and saved into a file? Or can not do screenshots on a single window only, not the whole screen? Turns out it can be done in a relatively easy way without having to install a program that is heavy and cumbersome.
How to Screenshot on a Computer 1

In principle we could photograph the screen and save it to a file or just copied it and put on a worksheet us. To photograph a computer screen (screenshot) and then save it into image files, we just capture the screen and take pictures through graphics software such as Photoshop or mspaint. And if we do not intend to keep it, the results had been able to capture directly included in the software that requires the image, eg placed on Microsoft Word.

Unlike the HP screenshots on Android that takes the whole screen, the computer may have been willing screenshot screenshot of the entire screen or want only one application window.

    For a screenshot of the entire screen we can use PrtScn keys on the keyboard.
    As for the screenshot in the window we could use the key combination ALT + PrtScn. If there are several active window then the screenshot made on the active window.
    For the record, PrtScn stands for Print Screen, and in some keyboards sometimes written with PrtSc alone.

Example screenshot of the full screen:


How to Screenshot on a Computer 2


Example screenshot of the window only: screenshot-windows-xp :


Here are 3 ways to do screenshots on a computer screen:


1. How to save a screenshot of a computer screen with Photoshop


    Set the conditions that will display on the display in the screenshot
    For a screenshot of the entire screen, press the Print Screen key on the keyboard (usually written PrtScn)
    For screenshots on the active window, press ALT + Print Screen button on your keyboard (usually written PrtScn)
    Open Photoshop software, and then click File> New and then OK
    Click Paste or press CTRL + V on your keyboard
    If true, then the image that will appear on photoshop screenshot
    Select a specific image area by using the tool CROP (optional course)
    Once the desired image can then save the image into a format that we like, eg JPG

The advantages of using Photoshop is a screenshot of the screen we can directly process the captured image into an image that suits our needs directly. For example, if we just need a little part of it, we can use the tool CROP and if we want to provide information in the form of arrows, circles and text we can directly do it with tools such as SHAPE and TEXT are all readily available in Photoshop.

Weakness process using Photoshop is a screenshot of the use of Photoshop itself. As it is known that Photoshop is a software with a paid license and its use also takes up space CPU and RAM usage is not small, so on some computers with minimal spec feels burdensome. Moreover the large screen resolutions such as 1366 × 768.

2. How to save screenshots on a computer / laptop screen with mspaint


    Set the conditions that will display on the display in the screenshot
    For a screenshot of the entire screen, press the Print Screen key on the keyboard (usually written PrtScn)
    For screenshots on the active window, press ALT + Print Screen button on your keyboard (usually written PrtScn)
    Open the Paint software, then click File> New and then OK
    Click Paste or press CTRL + V on your keyboard
    If true, then the picture in the screenshot will appear in Paint canvas.
    Once the desired image can then save the image into a format that we like, eg JPG

Excess screenshot using mspaint is the process speed and simplicity. It is not independent of Paint software is simple and lightweight, and easy to use. Moreover software is software built mspaint current Windows installation, so all computers with Windows operating systems can be sure to have it.

Disadvantages screenshot using mspaint lies in the quality of images produced. It was not separated from the lack of tools available. Besides the quality of the pixels when the image is saved into a JPG format also looks more rugged when compared to the time saved with Photoshop software.

3. How to screenshot on a computer / laptop screen without saving to a file (without software)


    Set the conditions that will display on the display in the screenshot
    For a screenshot of the entire screen, press the Print Screen key on the keyboard (usually written PrtScn)
    For screenshots on the active window, press ALT + Print Screen button on your keyboard (usually written PrtScn)
    Open the worksheet in the software that will be used to put our screenshots, eg Microsoft Word.
    Click Paste or press CTRL + V on the keyboard and the screenshot will be directly located on a worksheet us
    If true, then the picture in the screenshot will appear at the cursor position on the worksheet.

The advantage of this method is simple and fast without the help of other software. Screenshot images can be directly placed on a worksheet. But the drawback is that we do not have the documentation in the form of files that can be used at any time on another worksheet. This is because the results of the screenshots do not form but in the form of image data files that have been embedded in the worksheet us.

Thank for visit my blog about How to Screenshot on a Computer
Good Luck!

Reference: http://windows.microsoft.com/en-us/windows/take-screen-capture-print-screen#take-screen-capture-print-screen=windows-8

Next: <<<  Take Screenshot Android with 4 Options

Related Post:
How To Take Screenshot PC or Laptop Monitor Screen
4 Ways Take a Screenshot on a Mac
How to Screenshot on a Computer with 3 Method


How To Take Screenshot PC or Laptop Monitor Screen

How to Take Screenshot PC or Laptop Monitor Screen

Next <<<    How to Screenshot on a Computer with 3 Method

Hi All...Here's an easy way to Take Screenshot PC or Laptop Monitor Screen, happy reading!
The process of doing Screenshot or capturing PC monitor or laptop screen can be done with additional software or with the default application from windows. Using applications or software built from the windows in doing Screenshot more simple and easy course because we no longer need to first download the software we need. How to do it, here we provide full turorial.

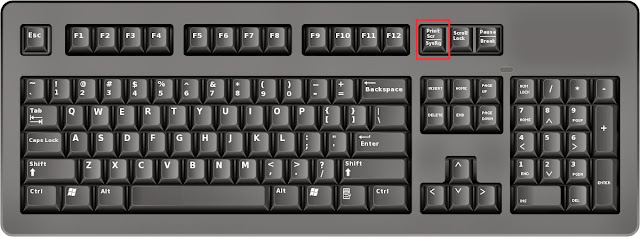
Prepare the object that we will take his Screenshot image, if it is press on the keyboard on the button PrtSc Sys Rq This button is usually located in the top right corner of the keyboard. See the picture below, find the button that is colored red. writing on this button varies depending on the type of the issuing manufacturer but essentially the same.

How to Take Screenshot PC or Laptop Monitor Screen 1


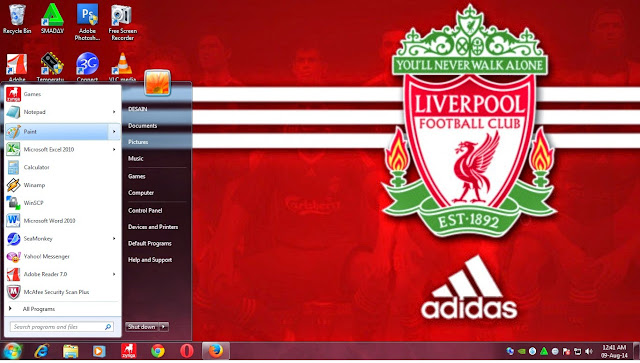
In this tutorial we took home standby menu on the monitor screen after you press the PrtSc Sys Rq further press on the home menu windows looking menu paint,

How to Take Screenshot PC or Laptop Monitor Screen 2


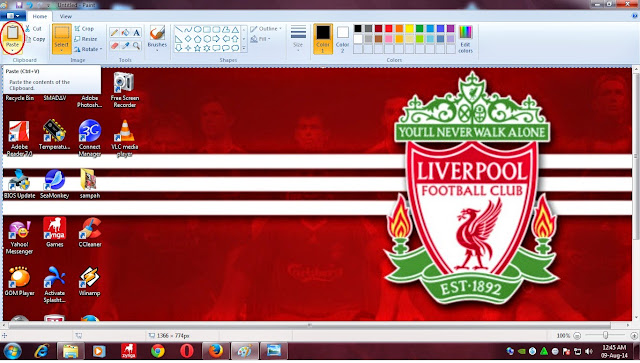
Then click on the Paste menu Paint menu. Home standby screen image that we have chosen will appear.

How to Take Screenshot PC or Laptop Monitor Screen 3


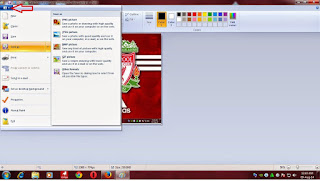
After that click on the home menu Paint then click Save As. Save the image in the form of JPG, or PNG or other files as you wish.

How to Take Screenshot PC or Laptop Monitor Screen 4


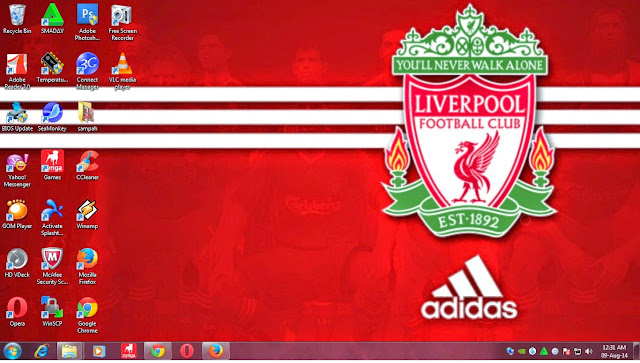
Process or capture screenshots on your PC or laptop screen is complete and the results are as follows:

How to Take Screenshot PC or Laptop Monitor Screen 5


Thaks for reading "How to Take Screenshot PC or Laptop Monitor Screen" at my blog.

Good Luck...  

Next <<<  How to Screenshot on a Computer with 3 Method

Related Post: 

Take Screenshot Android with 4 Options
4 Ways Take a Screenshot on a Mac
How to Screenshot on a Computer with 3 Method


4 Ways Take a Screenshot on a Mac

Next: < < How To Take Screenshot PC or Laptop Monitor Screen

4 Ways Take a Screenshot on a Mac 


Hello All... i just wanted to share how to take a screenshot mac, hopefully helpful.
Taking a screenshot on a Mac is not a new thing for veteran Mac owner. But often this question posed by the switcher, especially those who move from Windows. Taking screenshots on Windows requires multiple steps by pressing the "Print Screenshot", followed by opening Paint, then press Control + V.

What about Mac? There are several ways to take screenshots on your Mac, and everything is very flexible according to the needs of each person.

Here 4 Ways Take a Screenshot on a Mac :

1. Command + Shift + 3: Take a Screenshot on Mac One Screen


The resulting images will be stored on the desktop in PNG format. This screenshot making commonly used by users.

2. Command + Shift + 4: Take a Screenshot in Mac The Selected Areas

take a screenshot mac 1


Capturing screenshots in certain areas

Mac offers users the option to take a screenshot. When using this method, you have to choose the area that will serve as a screenshot. Once selected, eat screenshot will be stored on the desktop.

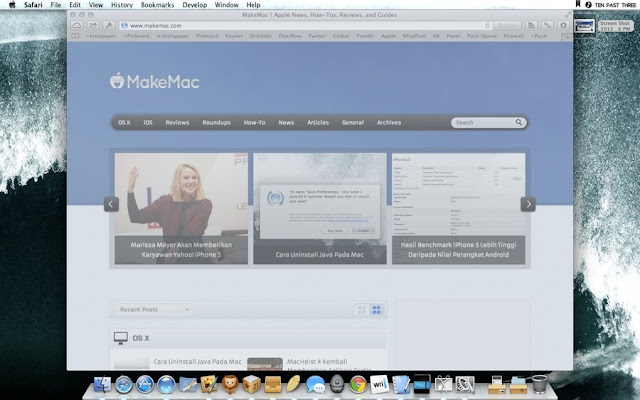
3. Command + Shift + 4 → Space: Take a Screenshot on Mac at Window Selected


take a screenshot mac 2

Capturing a screenshot on a particular window

If you want to take a screenshot for a certain window, for example screenshot for Safari window only, then this would be a very useful way. After pressing Command + Shift + 4, press space and will appear a small camera. Select the window that you want to be screenshots and the results will appear on the desktop.

4. Taking a Screenshot on a Mac Using Timer


Besides using the shortcut above, you can also take advantage of the Grab application which is the default OS X. Grab application can be found in the Utilities folder. In addition to offering the ability to capture screenshots already mentioned above, the Grab may also take screenshots after a few seconds. This function is very useful if you can not take a screenshot when an application shortcut override screenshot shortcut retrieval. Grab run and press Command + Shift + Z to take timed screenshots.


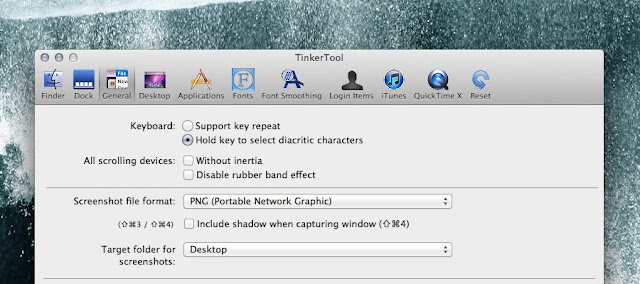
To Changing the format and location Screenshot


take a screenshot mac 3


Tinker Tool settings

Not everyone likes the PNG format and save the screenshots in the desktop. To change two things are very easy. Tinker Tool ever used to disable Resume can change on the part of General.

Thank you, you have read 4 Ways Take a Screenshot on a Mac in my blog.

Just try...Good Luck!


Next <<<  How To Take Screenshot PC or Laptop Monitor Screen


Related Post:

 How To Take Screenshot PC or Laptop Monitor Screen

 How to Screenshot on a Computer with 3 Method

 Take Screenshot Android with 4 Options