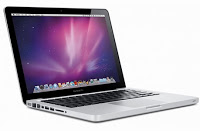
How to Screenshot on a Macbook or Mac OS X
Prev<<< How To Take Screenshot Windows PhoneHave you ever looked Printscreen button on the keyboard macbook ?? I believe you lied when saying look this. There is not Prinscreen button on the keyboard MACBOOK. If there is no button prinscreen then how to do prinscreen on macbook ?? Do you think the founding fathernya mac, Steve Jobs forget about Printscreen? Haha..
 |
| Macbook |
Of course PrintScreen CAN be done in Macbook / Mac OS X, There are several ways to do prinscreen / Print screen in macbook some of them:
1. By using an application called GRAB
GRAB is an Apple application that allows to perform Macbook Screen Capture on-screen, this program can take a picture of the entire screen, the active application window picture, and may even take your own.
You can find it in APPLICATION / UTILITIES / GRAB
But there are some drawbacks in using this application that you need more memory to run it, then you will have difficulty if you want to take pictures of the menus hidden / concealed from an application if you want to make a tutorial or something.
2. Using SHORTCUT or a combination of several keyboard
I recommend you to use this road. In addition to easy, how is classified as the most effective way and also the easiest to do printscreen in macbook / Mac OS X.
You only need to exercise three buttons pressed simultaneously. I'm sure you already proficient and able to do this.
How to do a printscreen with Shortcut is:
2.1. Take pictures WHOLE SCREEN
Press: Cmd + Shift + 3 and release simultaneously.
After doing this you will see an image on your desktop called PICTURE 1, which is the result of your printscreen.
 |
| How to Screenshot on a Macbook or Mac OS X (1) |
2.2. Amounting to take screen shots of your wishes
Press: Cmd + Shift + 4 and release
Next you will see korsur turn into the +
Next use the mouse to select and determine the amount of area on the screen you want to capture.
Results capture will also be visible on the desktop.
 |
| How to Screenshot on a Macbook or Mac OS X (2) |
2.3. Take a picture of an application window on the screen
Press: Cmd + Shift + 4 and release simultaneously then press SPACE.
Next you will see korsur turned into a sign CAMERA
Next you just direct the camera korsur to window or windows you want to capture / grab.
Results capture will also be visible on the desktop.
 |
| How to Screenshot on a Macbook or Mac OS X (3) |
That's the way to take pictures from the desktop using the Printscreen in Macbook or Mac OS X, I hope this tutorial can be useful for the reader who faithfully read this article.
Related Articles:
http://creatscreenshot.blogspot.com/2015/07/how-to-screenshot-on-computer-with-3.html
How to Screenshot on a Computer with 3 Method
http://creatscreenshot.blogspot.com/2015/07/take-screenshot-android-with-4-options.html
Take Screenshot Android with 4 Options
http://creatscreenshot.blogspot.com/2015/07/desktop-screenshot.html
Desktop Screenshot
http://creatscreenshot.blogspot.com/2015/07/prev-desktop-screenshot-screenshot-on.html
Screenshot on Samsung s4
http://creatscreenshot.blogspot.com/2015/07/how-to-screenshot-in-windows-7.html
How to Screenshot in Windows 7
http://creatscreenshot.blogspot.com/2015/07/take-screenshot-windows-8.html
Take Screenshot Windows 8
http://creatscreenshot.blogspot.com/2015/07/take-screenshot-iphone-and-iphone-6.html
Take Screenshot Iphone and Iphone 6
http://creatscreenshot.blogspot.com/2015/07/screen-capture-android-on-some-android.html
Screen Capture Android
http://creatscreenshot.blogspot.com/2015/07/how-to-screenshot-on-sony-xperia.html
How To Screenshot On Sony Xperia
http://creatscreenshot.blogspot.com/2015/07/how-to-take-screenshot-windows-phone.html
How To Take Screenshot Windows Phone


No comments:
Post a Comment
Note: Only a member of this blog may post a comment.